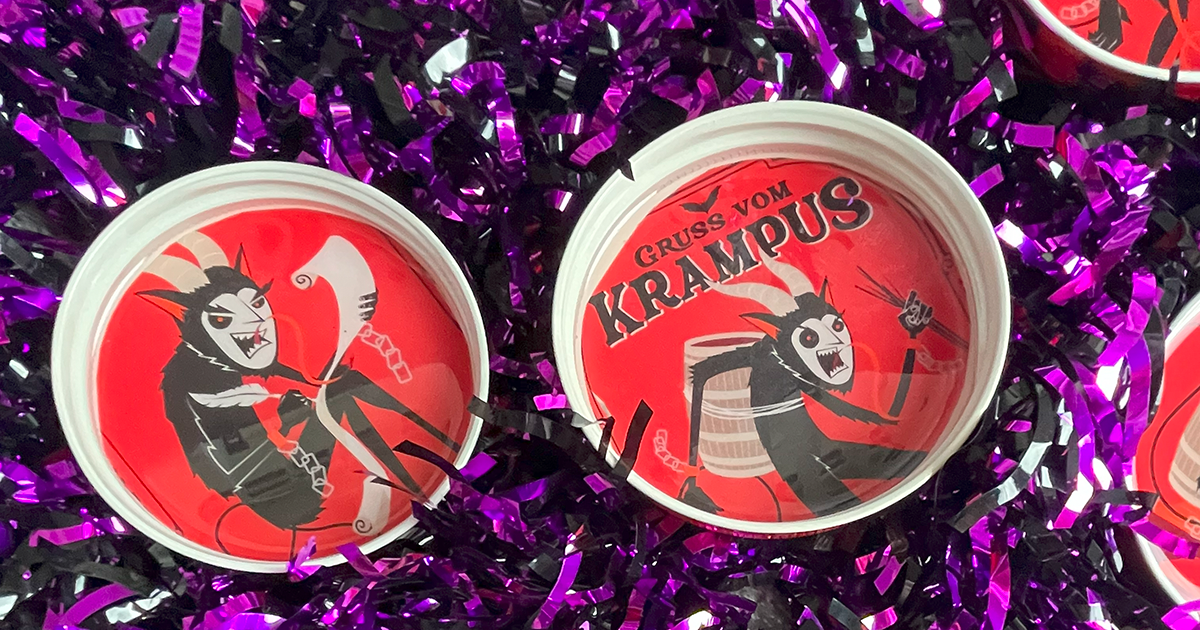
Krampus is coming! Are you ready?
I received compensation in return for creating this craft project. This post also contains affiliate links. See my disclaimer for more.
I love that the scariest Christmas creature (and there are several of them!) keeps getting more popular year after year with Halloween lovers—so popular that my friends over at Spooky Cat Press have dedicated an entire line of products to him!
And sure, I could have sent all my friends Krampus cards…but why not turn them into a small gift they can use year after year? In this post, you’ll find a DIY for how to turn cards into coasters, like these Krampus ones.
While it does require a few special items, it’s a very easy and quick craft that I will definitely be repeating. Use it with regular greeting cards, Halloween cards you love, creepy holiday cards, or even spooky season photos!

Krampus Coaster Craft
Supplies:
- 4-8 greeting cards from Spooky Cat Press (what I used)
- One-piece wide-mouth Mason jar lids (what I used)
- Pencil
- Scissors
- EasyCast Clear Epoxy (what I used, enough for 8 coasters)
- Plastic cups (disposable, 2)
- Stir stick (1-2, use something disposable like a popsicle stick)
- Scrapbooking adhesive tape
- Flat tray (like an old cookie sheet)
- Wax paper
Notes: Make sure you search the exact phrase “one-piece wide-mouth Mason jar lids” to find the correct ones. Two-piece lids won’t work for this. You’ll also prefer wide-mouth lids to accommodate glasses better, I promise.
I had trouble finding the epoxy kit at local craft stores, so I ended up ordering mine online.

Instructions:
1. Take one of your Mason jar lids and place it on top of the greeting card image you want on the coaster. Trace around the edge of the Mason jar lid with your pencil, then cut out the circle. Repeat until you have all your coaster images.
2. Using the scrapbooking adhesive tape, draw an X on the back of your coaster images, then place face-up in the Mason jar lid. Press into place. The adhesive will help hold them in place and keep the epoxy from getting under the paper. This style of adhesive also works better than glue since it won’t create bumps under the paper.
3. Place a sheet of wax paper onto your flat tray, then place your prepped Mason jar lids on top. Once you add the epoxy, you’ll want to let these sit on a flat, protected surface for at least 24 hours.
4. From here, you’ll want to follow the instructions in your epoxy kit. For the brand I recommended, you mix even parts of the two liquids together in a plastic cup and stir with a stir stick for two minutes. Then transfer liquid to a clean plastic cup and mix for another minute. Pour immediately into your Mason jar lids—just enough to coat should be fine (about 1/8-1/4 inch).
5. Set the tray on a flat surface and allow the epoxy to cure for 24-72 hours. (The longer the better!)

Helpful tips: Since you have to pour quickly with the epoxy mixture, I went back and tilted all my coasters to make sure the paper was fully coated. I also tapped a few of them with bubbles to make those rise to the surface. I had no issues with bubbles being trapped in the final product after it cured.
The epoxy kit I recommended was enough to make 8 coasters. If you want to make more than that, you’ll need to buy a larger kit or multiple kits.
The one-piece wide-mouth Mason jar lids come in LOTS of colors, so if red isn’t your thing shop around for other color options. I would stick to metal ones for this craft, however.
![]()
Looking for more spooky holiday crafts?
Here are a few posts you might enjoy!
This post contains affiliate links. If you click an affiliate link and make a purchase, Spooky Little Halloween will earn a small commission for the referral at no cost to you. Read more about affiliates & disclaimers here. I am a participant in the Amazon Services LLC Associates Program, an affiliate advertising program designed to provide a means for us to earn fees by linking to Amazon.com and affiliated sites.
creditSource link


